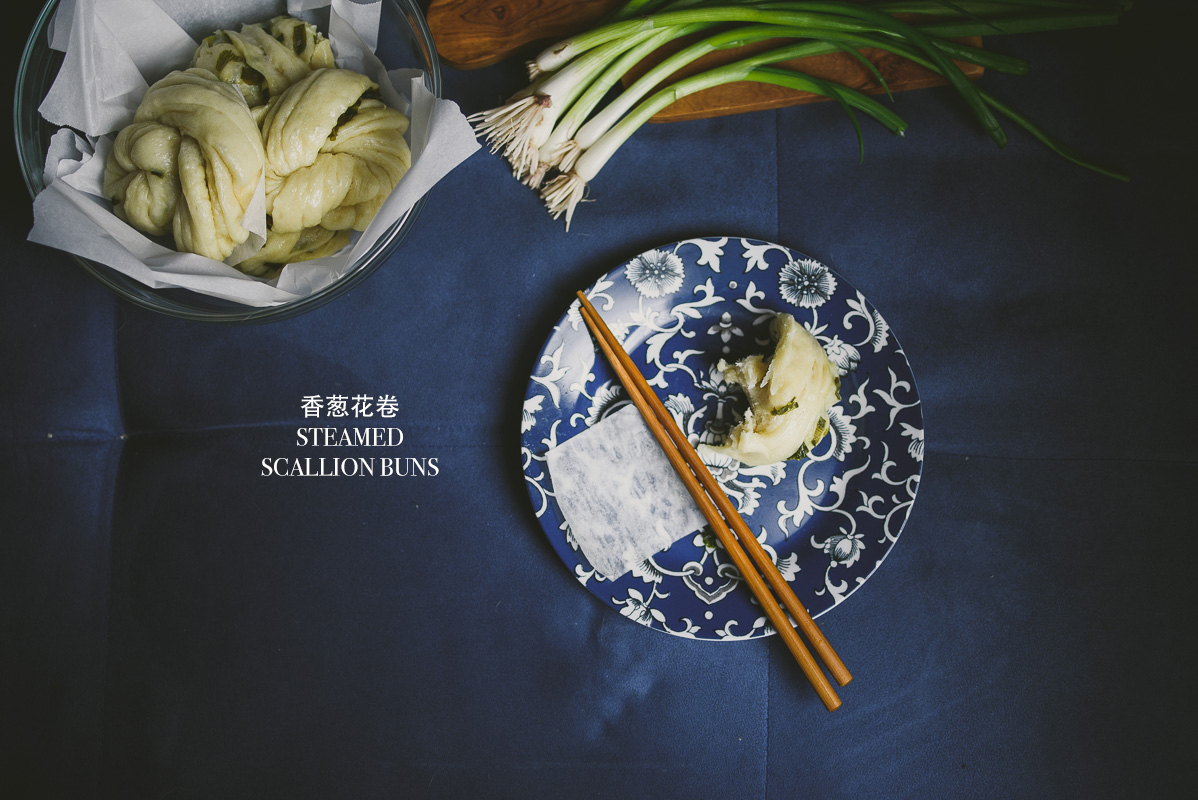
香葱花卷 Steamed Scallion Flower Buns, two ways
 UPDATE 3/17/21: Find a reworked, updated recipe in My Shanghai cookbook. I’ll leave this recipe up in case you wanted to try it out, but the recipe in my book is fluffier, more flavorful, and overall better 🙂
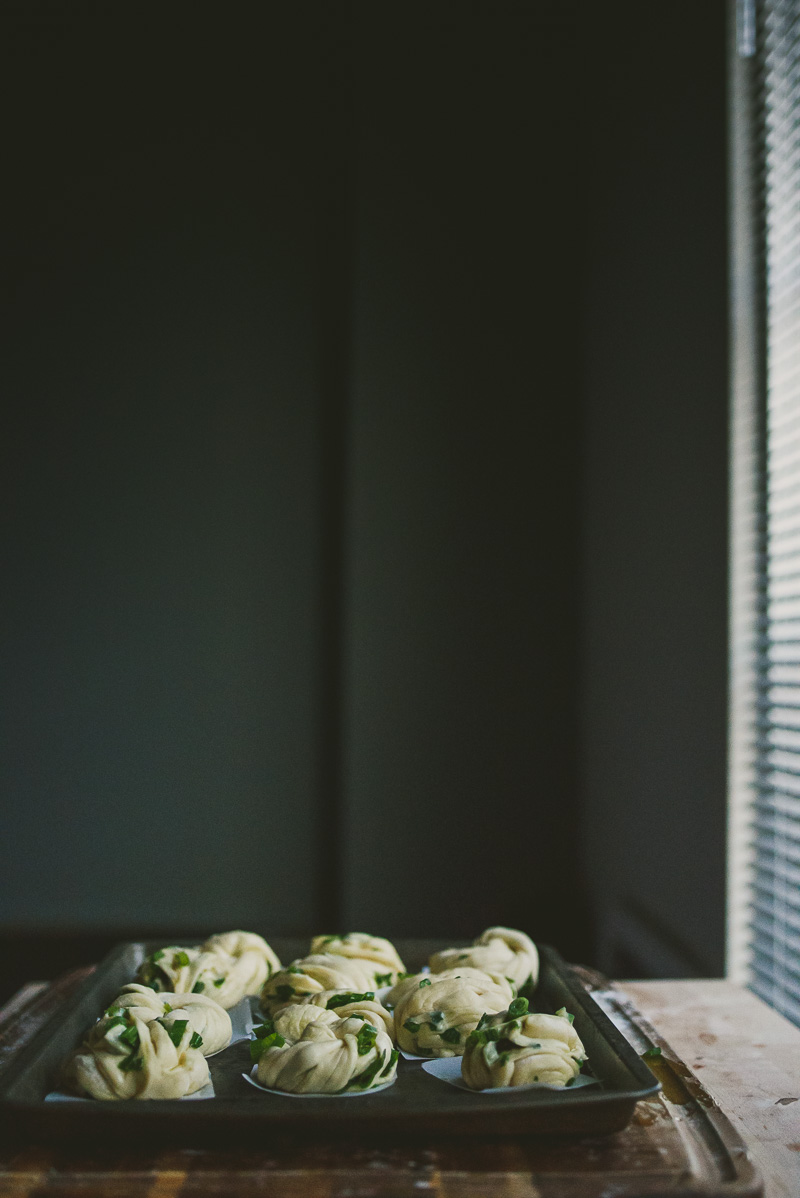
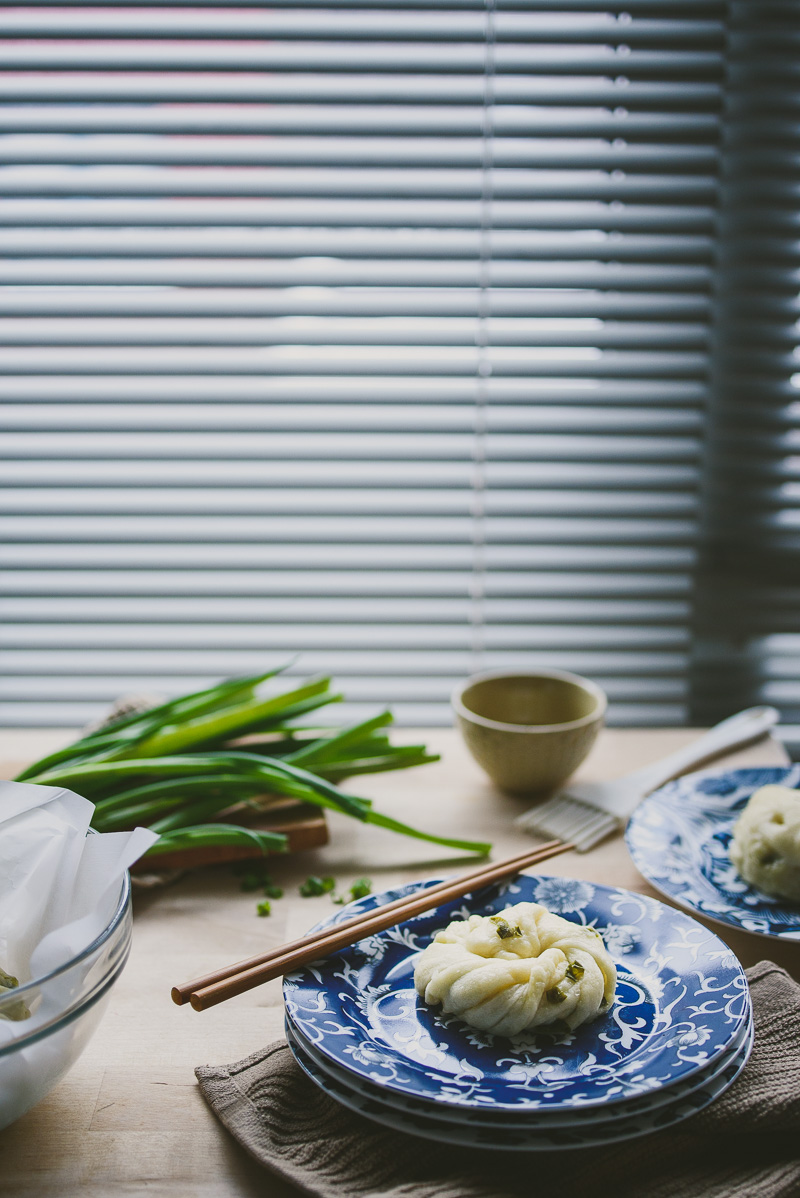
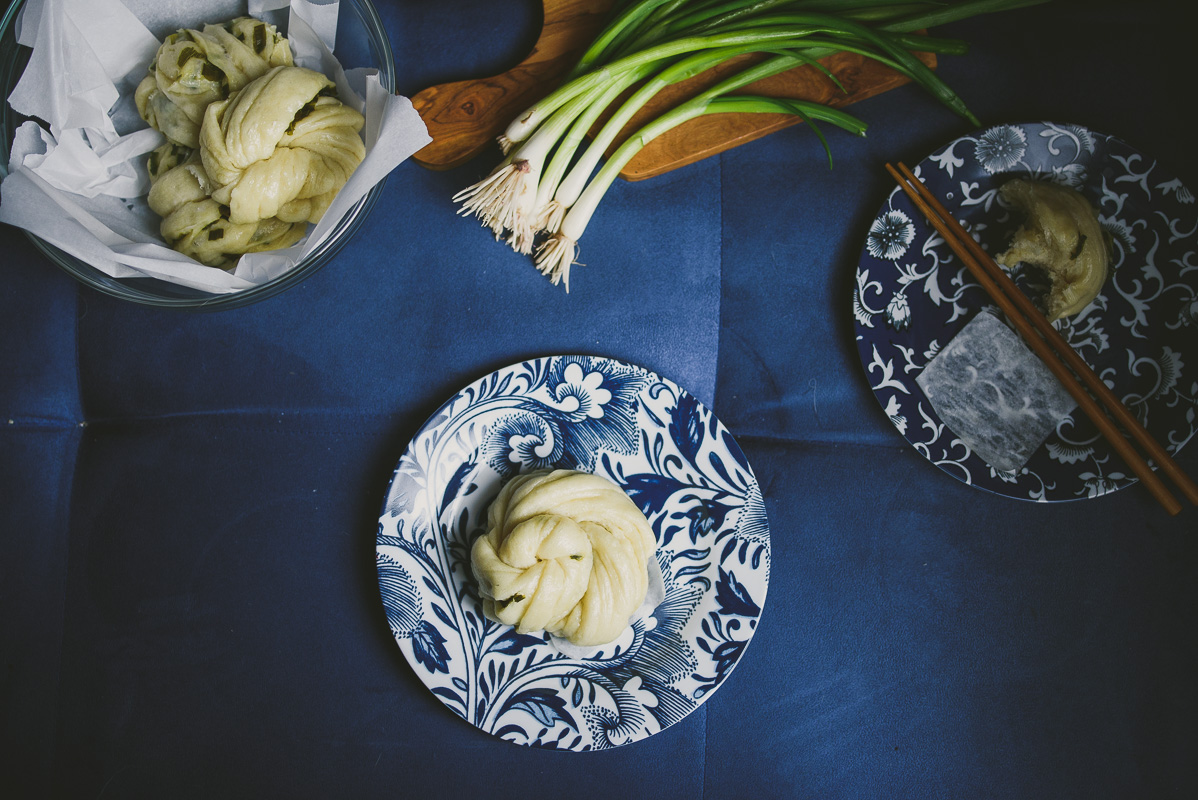
香葱花卷 literally translates to fragrant scallion flower buns. Aka, steamed scallion buns. I kept the flower because I liked the image it evokes. It’s in the single digits here in Boston, and I am freezing. I’m downing coffee, tea, ginger soup – whatever works to keep me warm. During times like these, I crave comfort food. I’m not talking about mac and cheese or lasagna (though everyone knows I can’t say no to those either), but this particular afternoon, I was craving Chinese comfort food. I had all the ingredients, so I made scallion steamed buns. This is an easy recipe and very very satisfying. I love shaping the buns and watching them bloom and grow in the steamer. I don’t use a bamboo steamer – I think I was influenced by my parents. They’ve always used a metal steamer, sometimes with a double rack. When it came time for me to acquire my own, I automatically veered towards a meal one. Call it comfort. Call it convenience, whatever. You can use a bamboo steamer if you’d like.
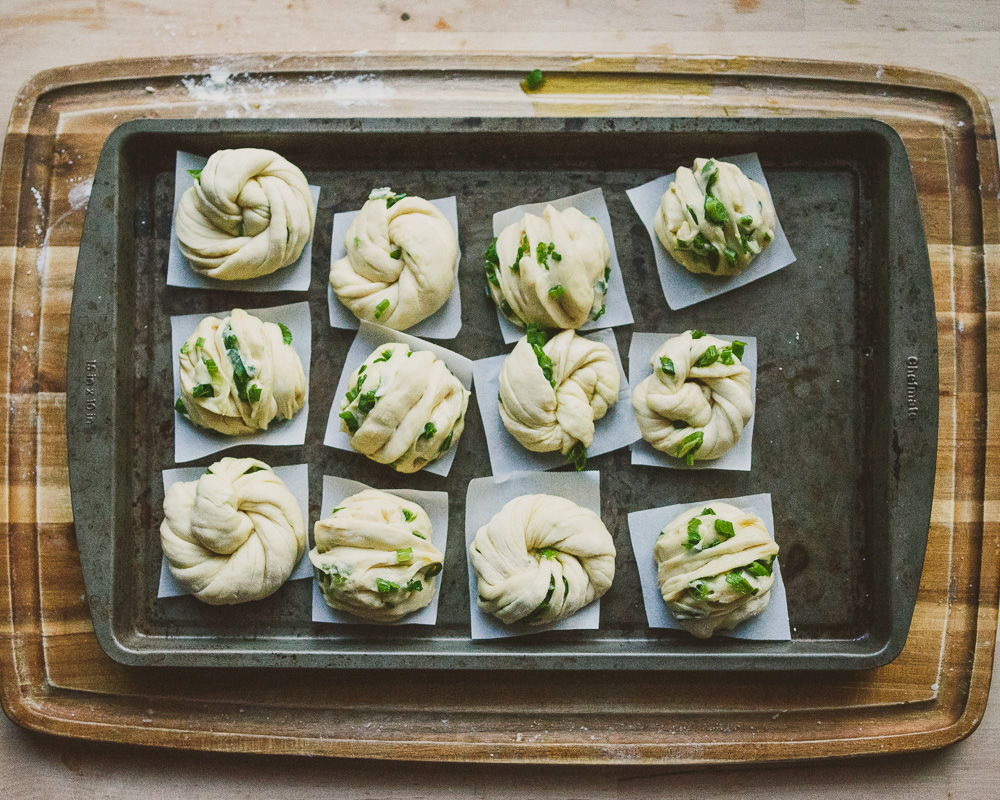 There are two ways you can shape the buns. One uses a knife, the other uses a chopstick. both creates laters, although I have to say the method using a knife creates more layers, and you’ll see why.
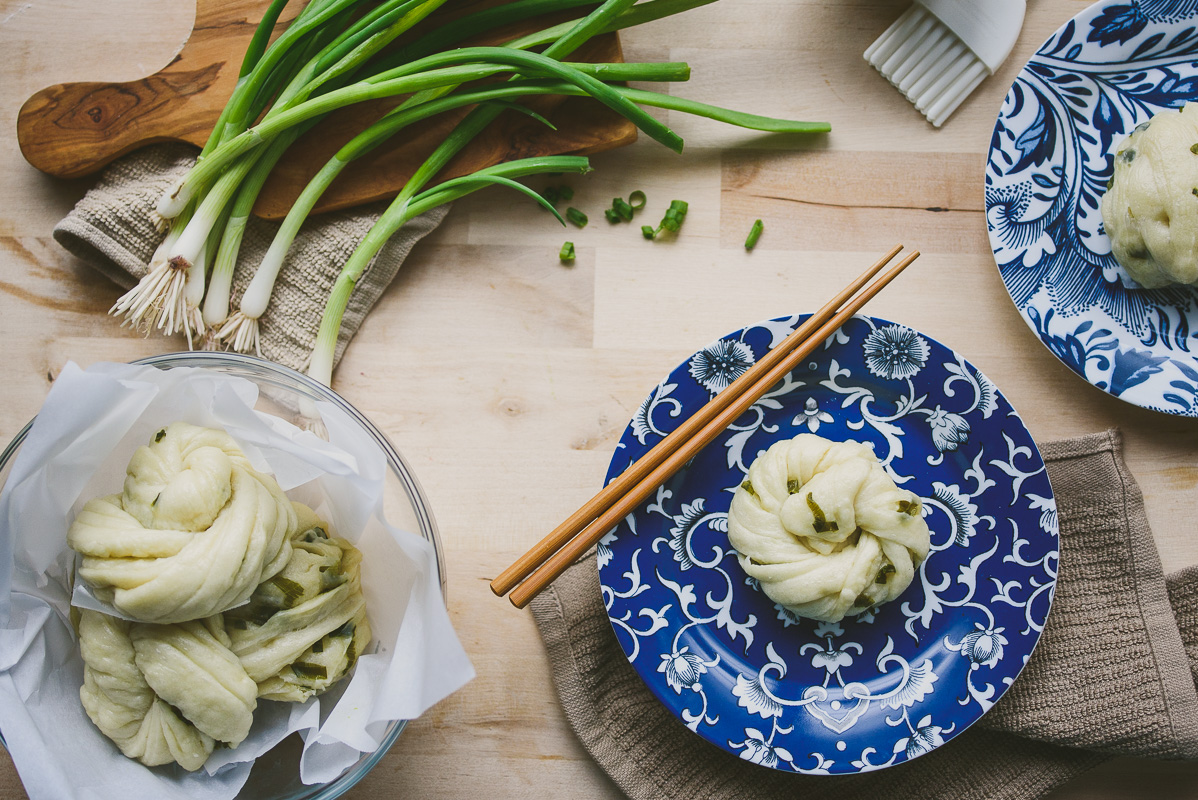
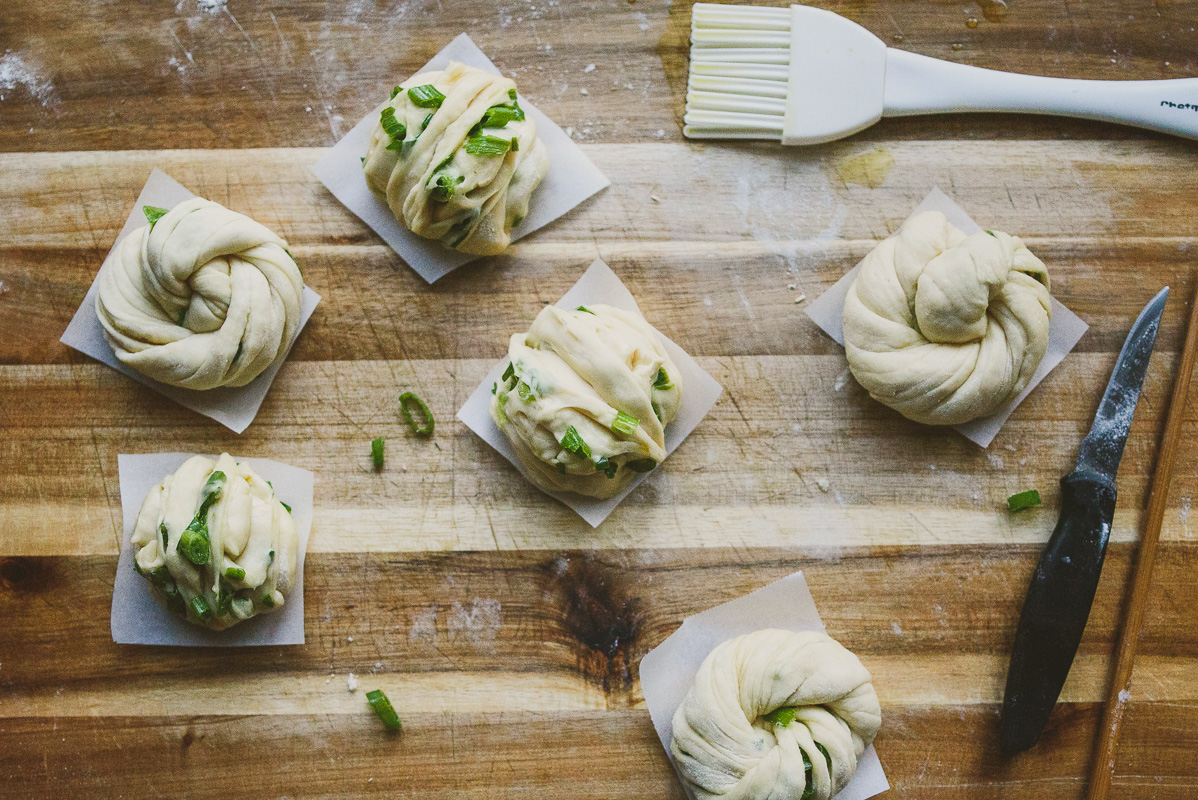
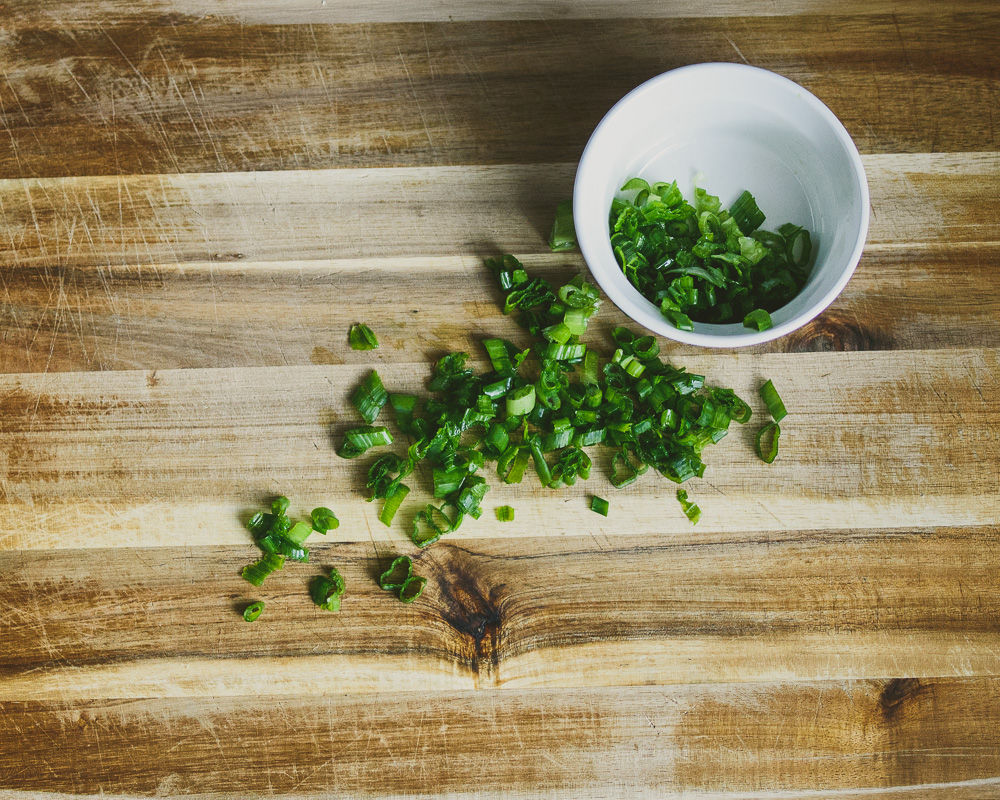
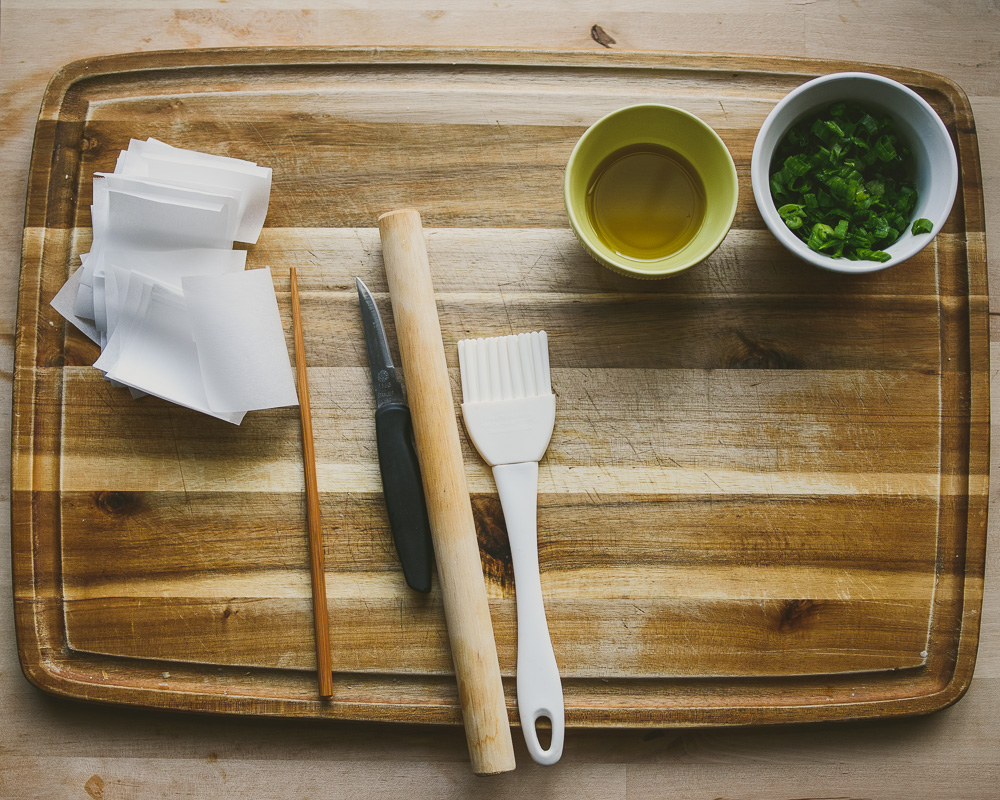
There are the tools you need: rolling pin, brush, knife, chopstick, pre-cut squares of parchment paper, olive oil, and chopped scallions, green parts only.
First, divide dough into two.
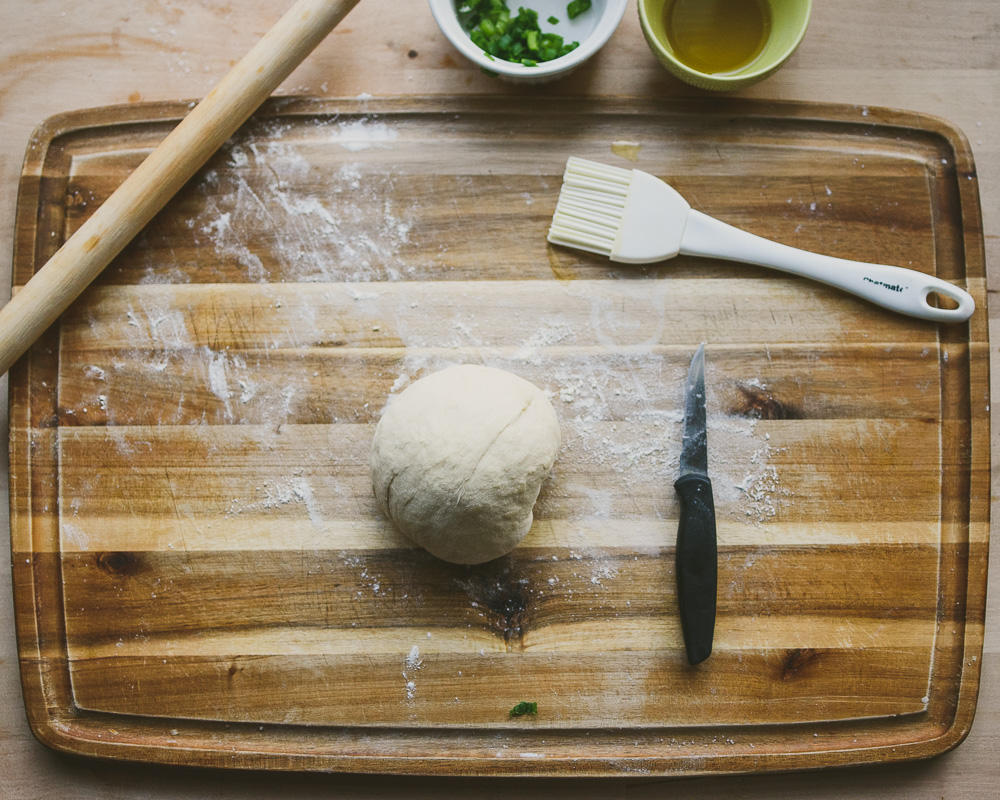
Method One: Using a Knife
Take one ball of dough and pinch into 6 smaller balls.
Roll into an oval shape.
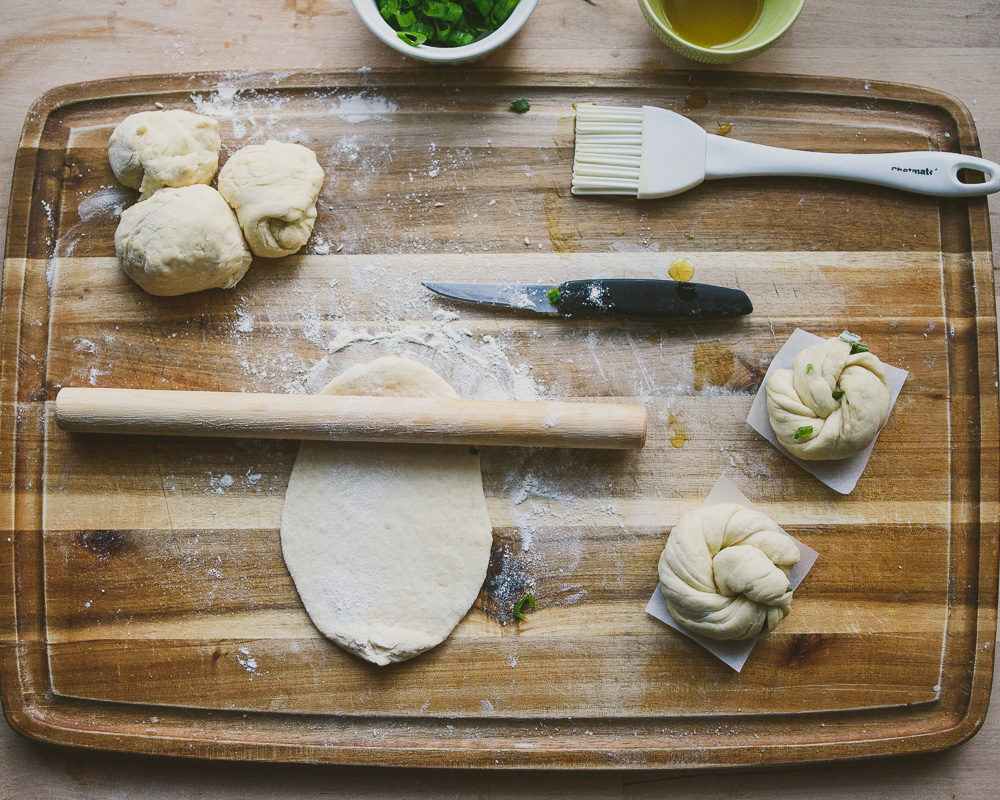 Using a knife, cut some slits vertical length wise in the dough. Make sure you do not cut through the edges. Brush with olive oil and sprinkle with salt and scallions.
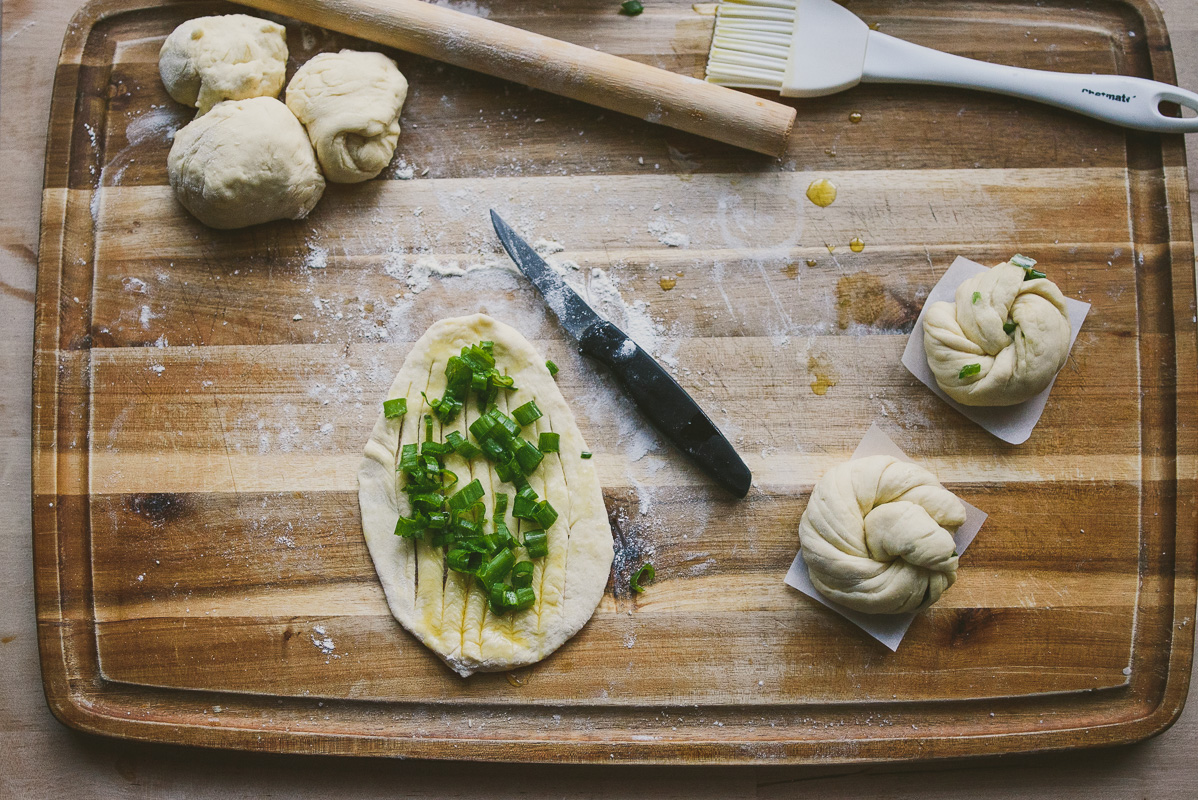
Begin to twist holding each edge.
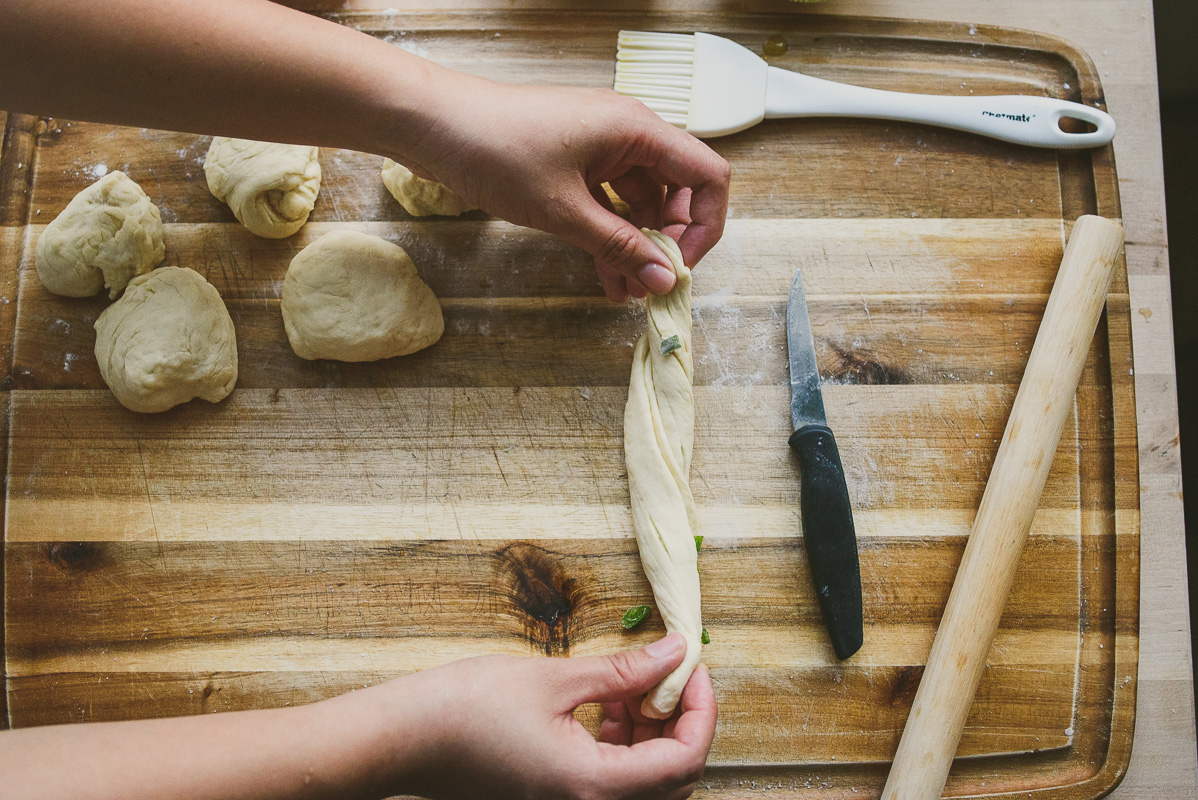
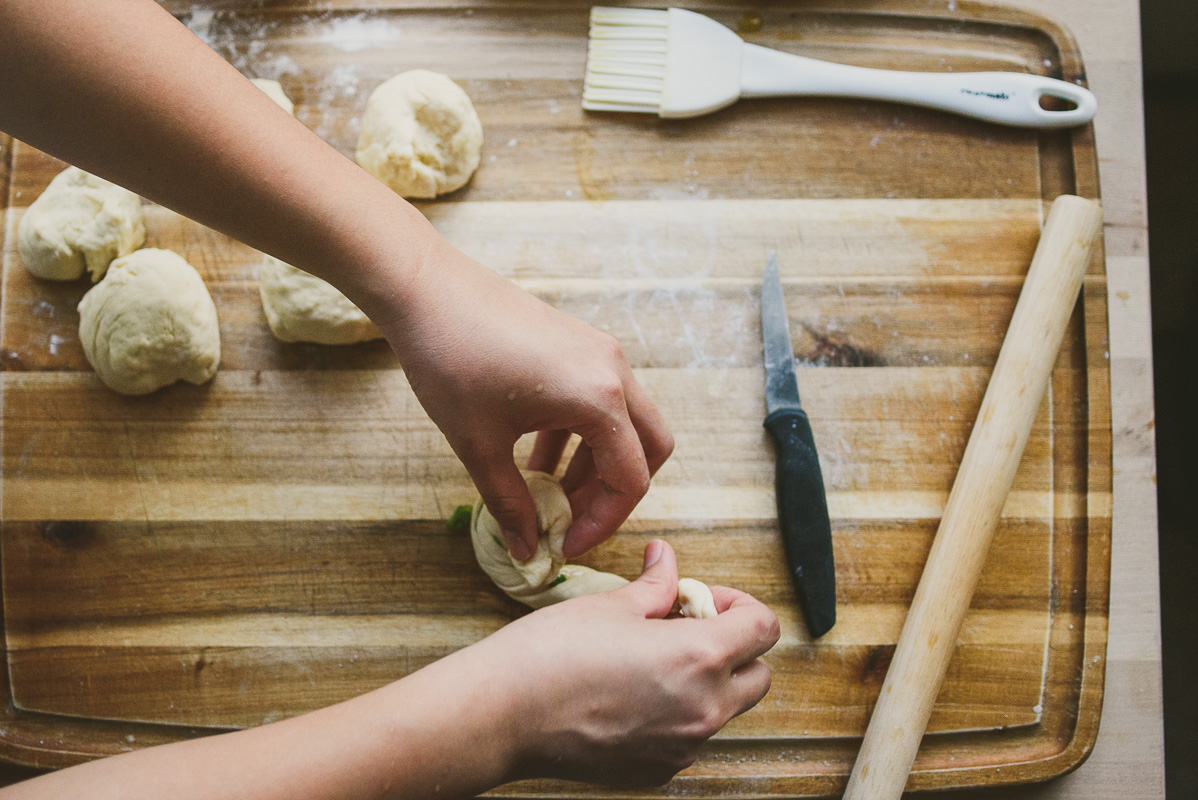
And twist into a swirl bun shape.
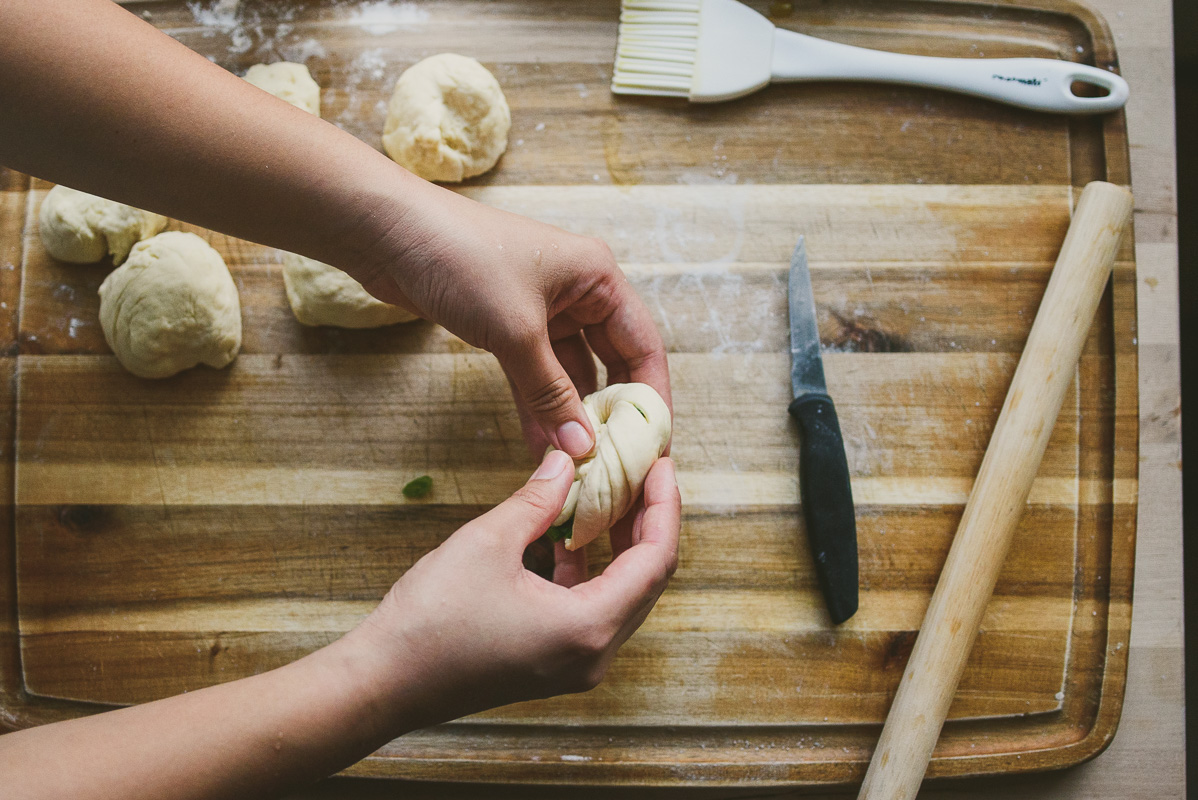
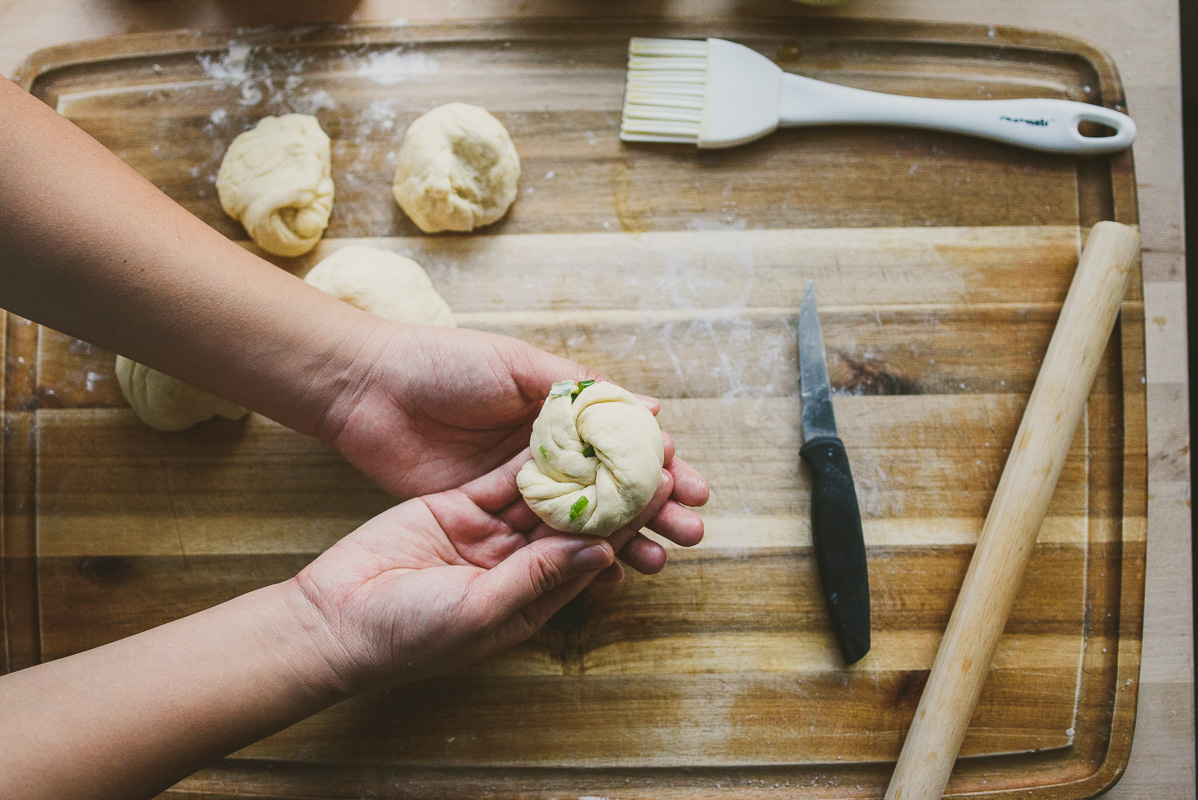
There, that wasn’t too hard was it? Alex used to buy these, frozen, from the local Asian supermarket.
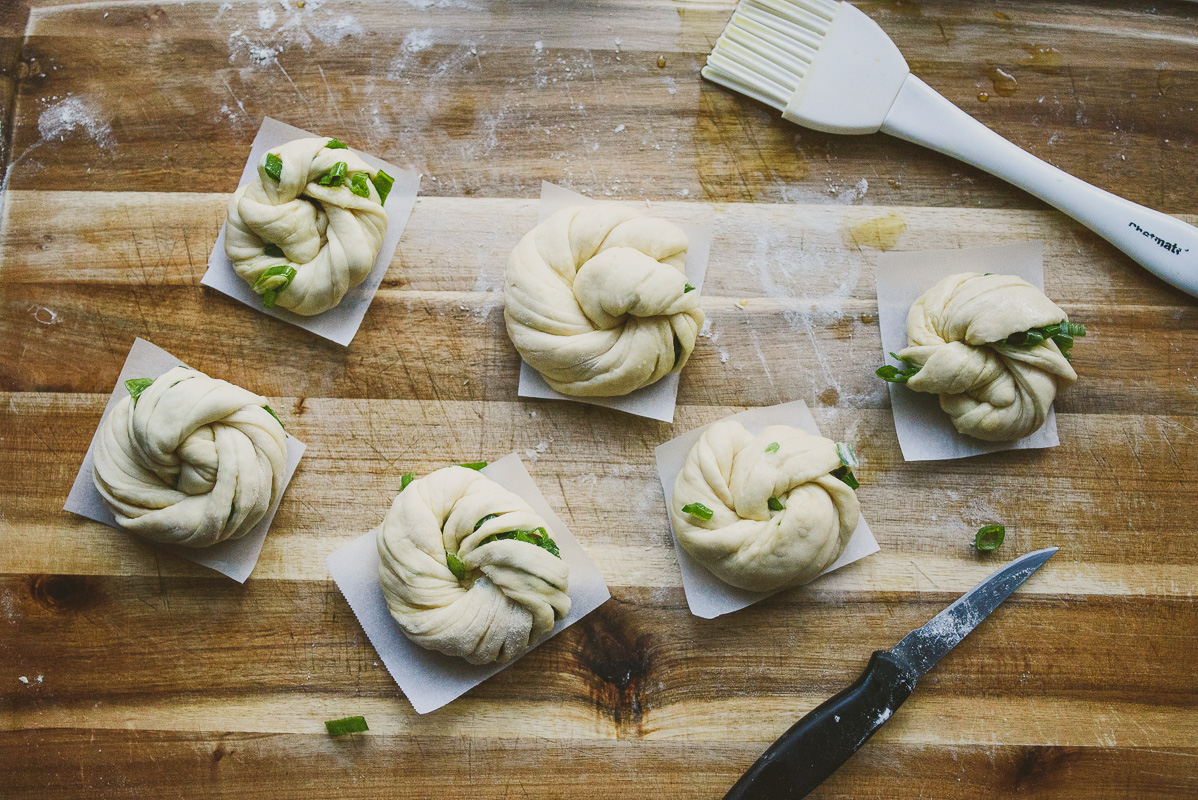
Method Two: Using a Chopstick
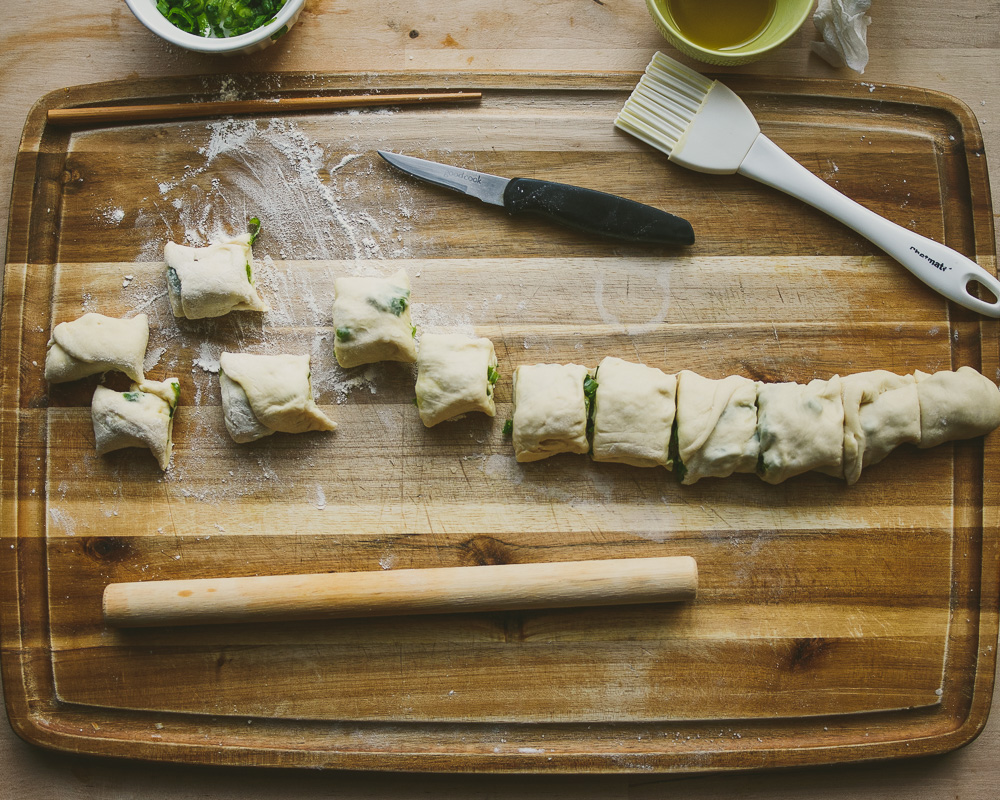
With this method, you first roll out the entire dough onto a lightly floured surface. Brush oil over the surface and dump the rest of your scallions across the surface. Roll it up tight. Then, cut it into TWELVE equal pieces.
*This is different from method one in that when you cut the pieces, they are already rolled up with oil and scallions.
Next, place one piece right on top of the next. Take a chopstick and press it down the middle, with the open ends on either side of the chopstick
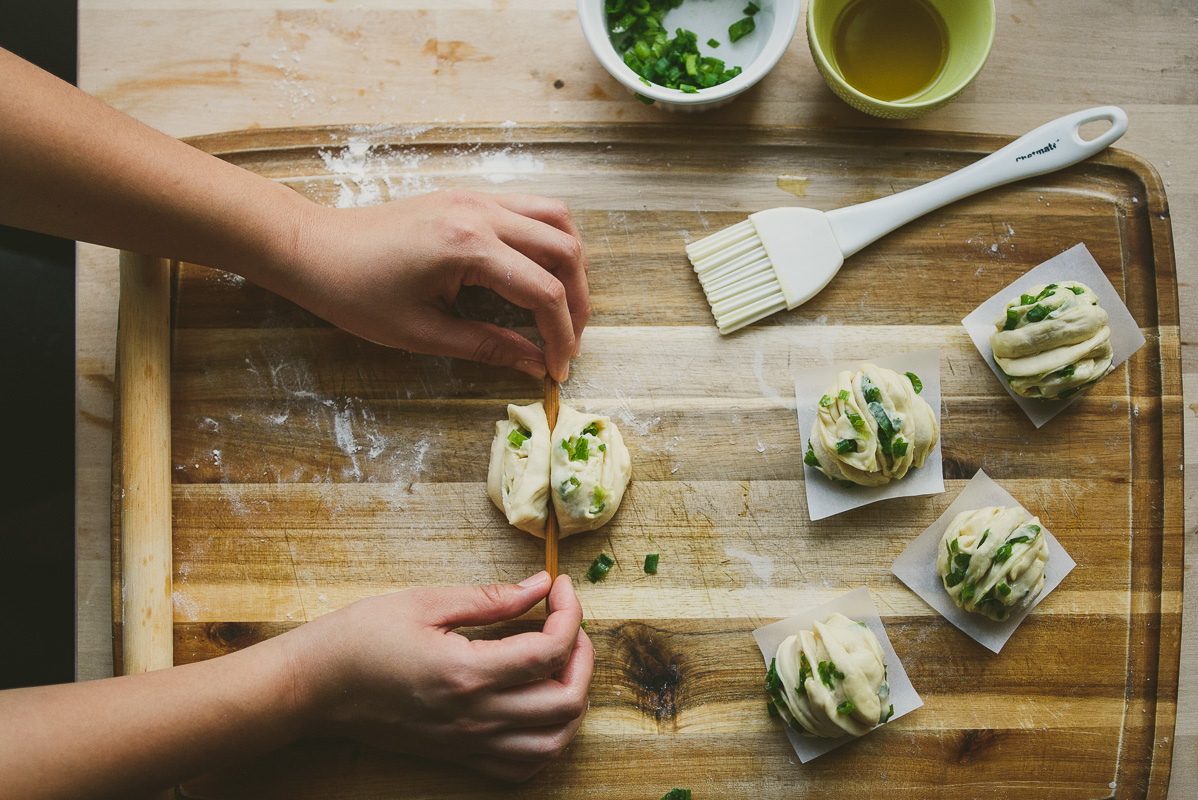
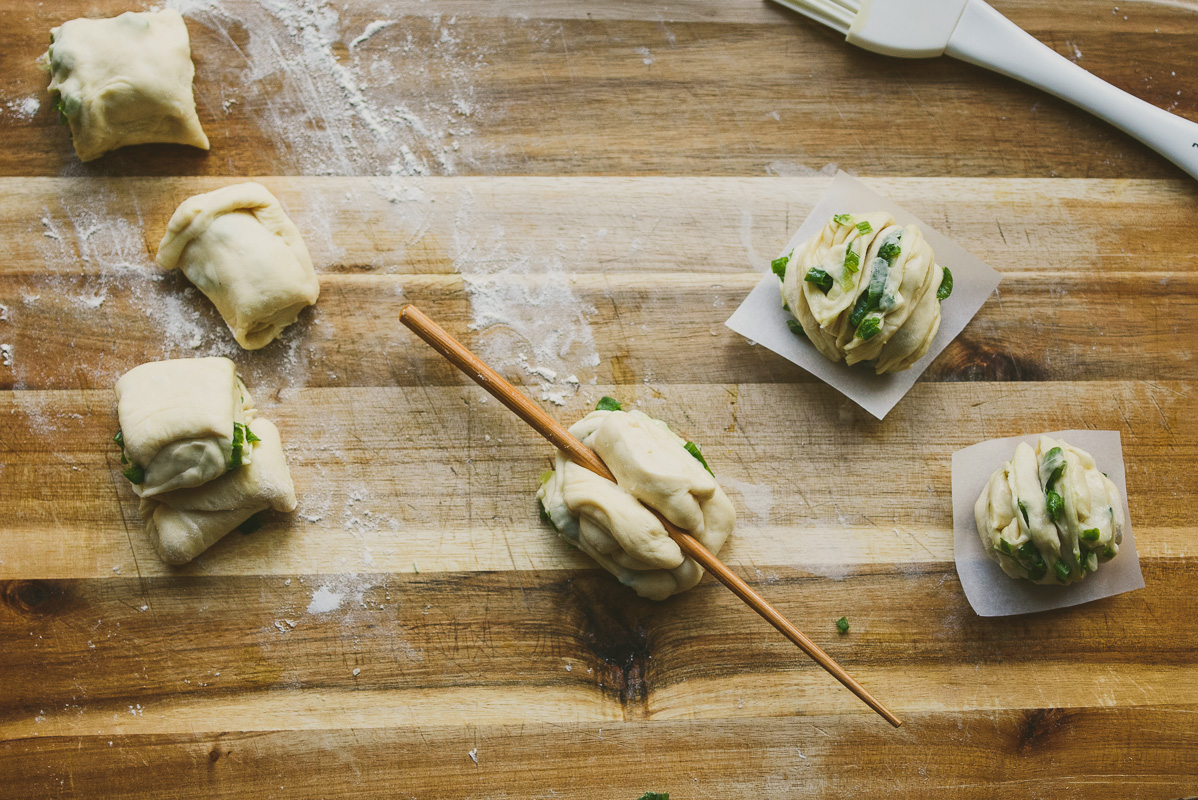
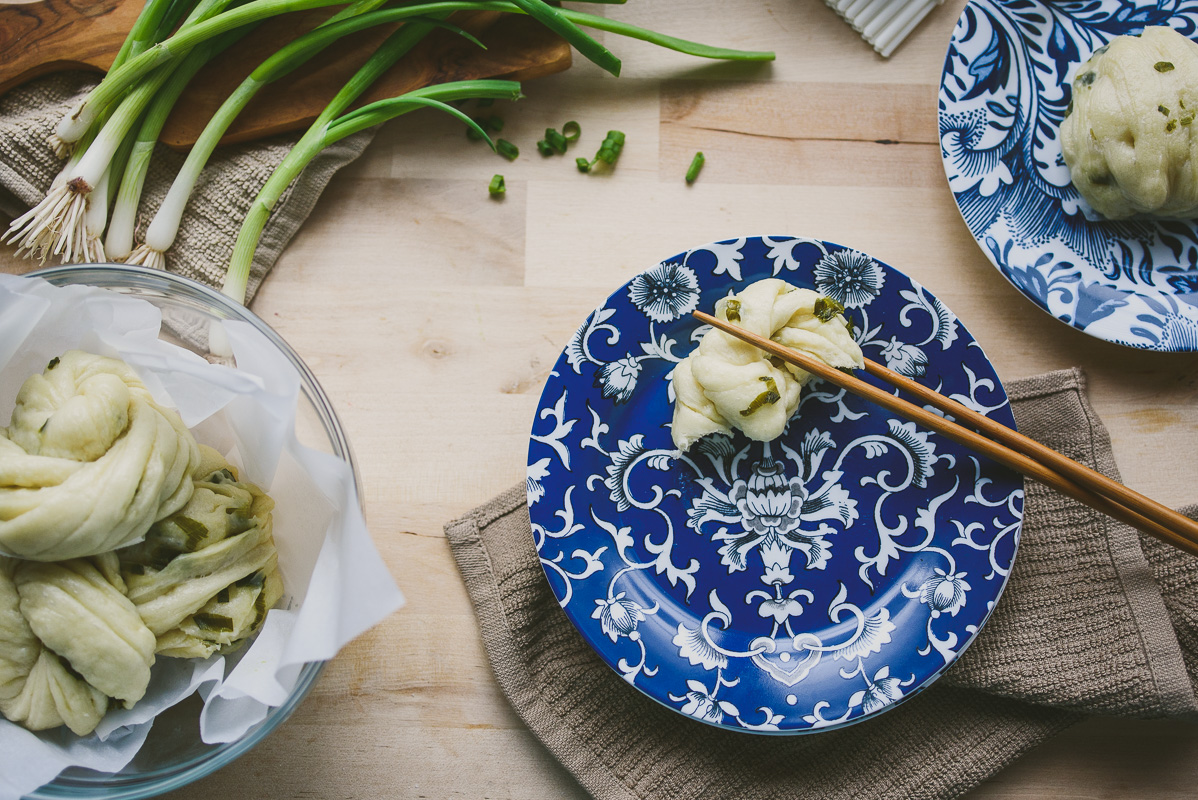
Remove chopstick, and grip the two edges, and use your fingers to peel it around and under the buns, forcing the “lips” you’ve created to pucker up and out.
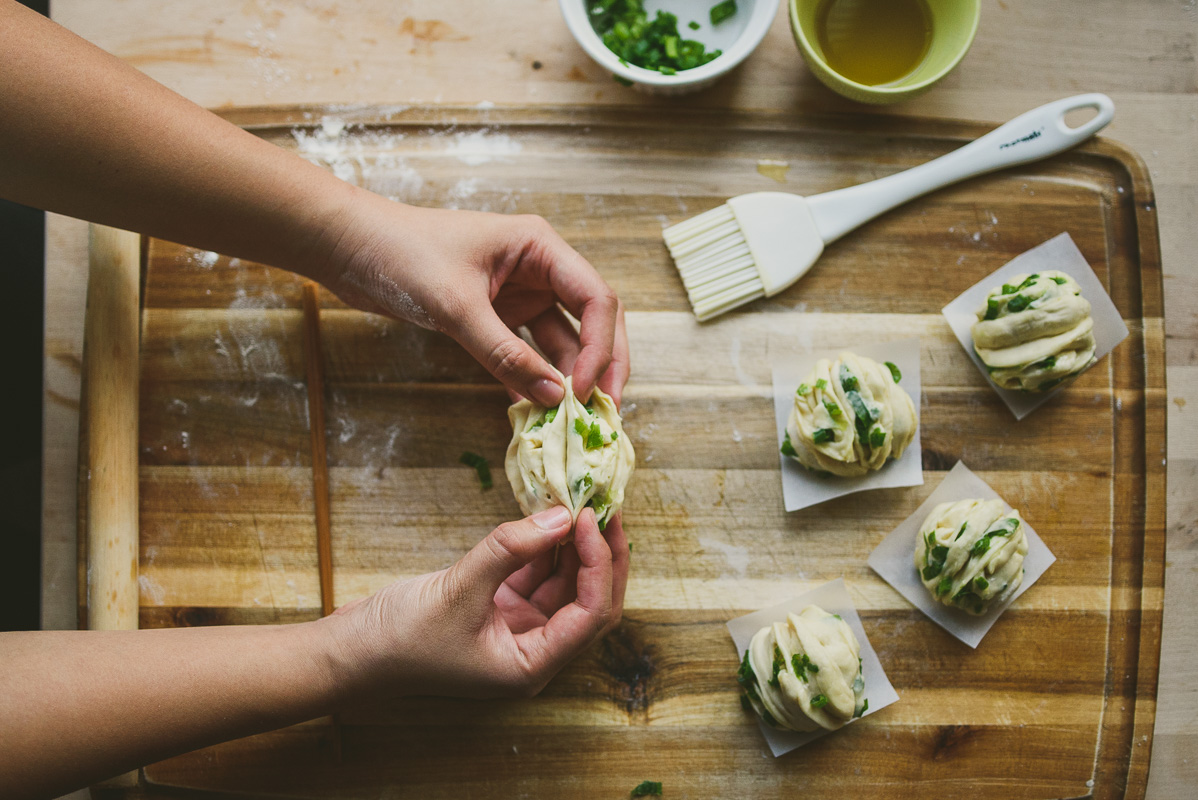
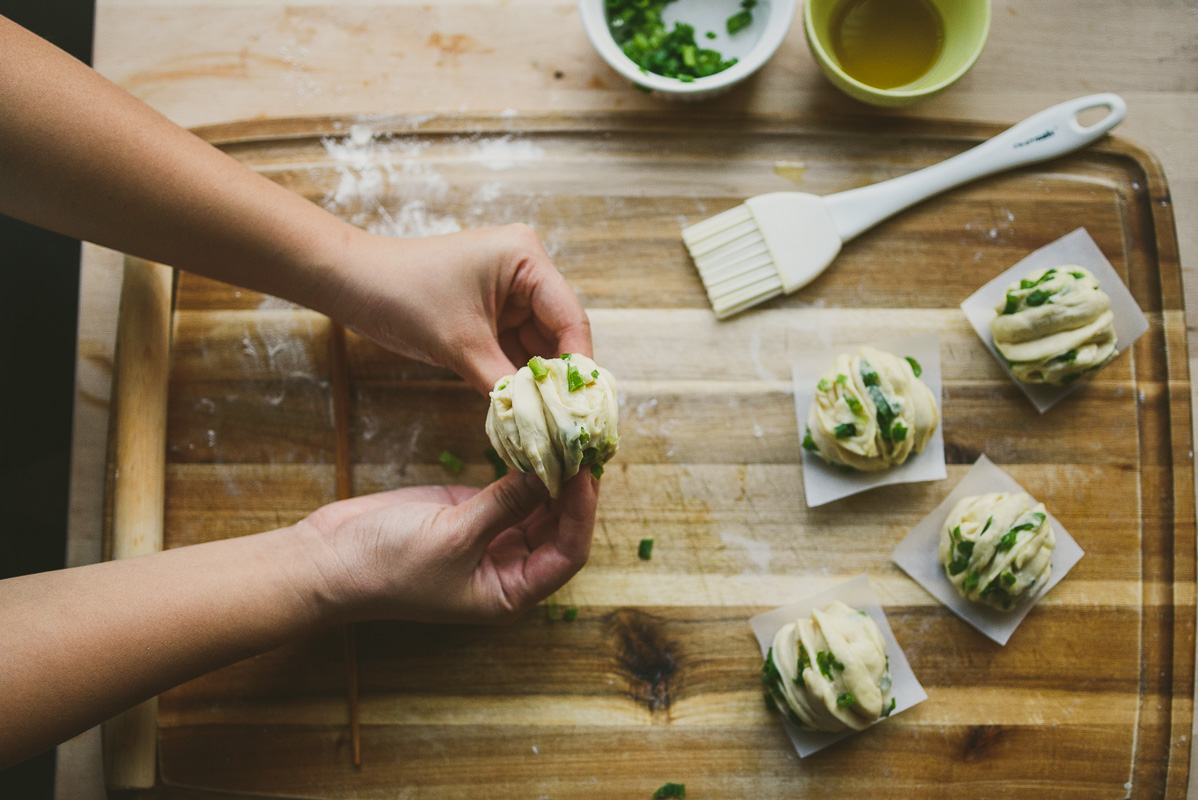
Place them on pre-cut pieces of parchment paper and get ready to steam them.
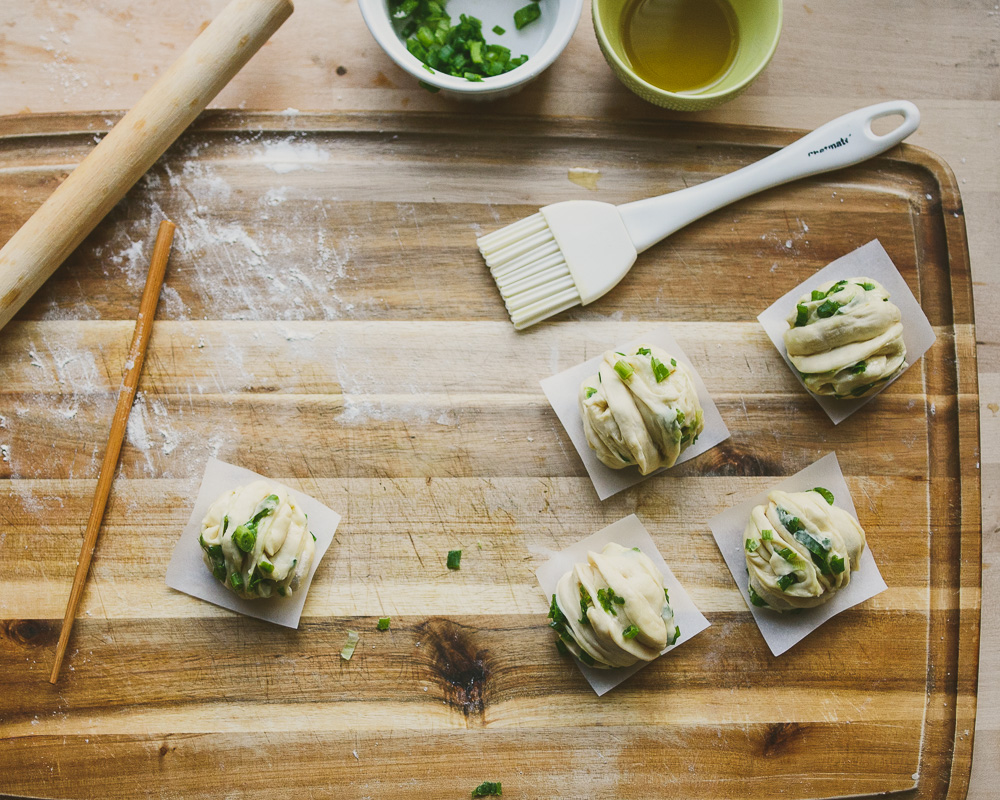
Either method works – it’s really up to your personal preference. Next step is to steam it (with parchment paper) for 12 minutes, then turn off the heat and let it sit, lid on, for another 5-6 minutes. Make sure to leave space between the buns when you steam them, because they grow. They really do.
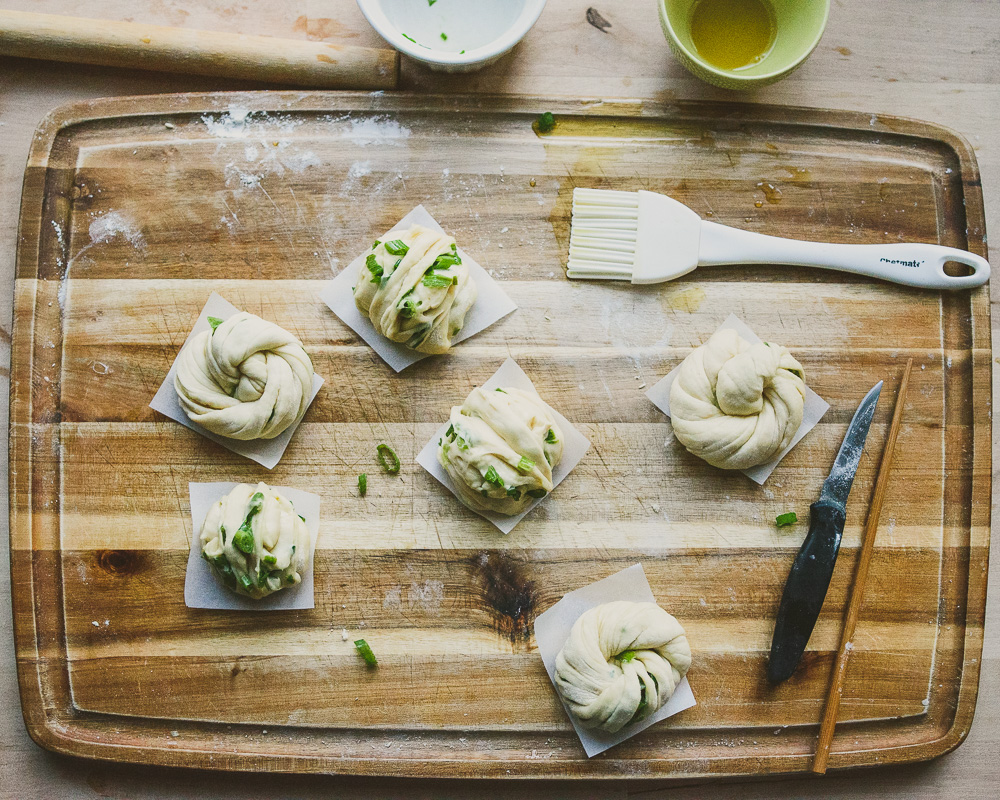
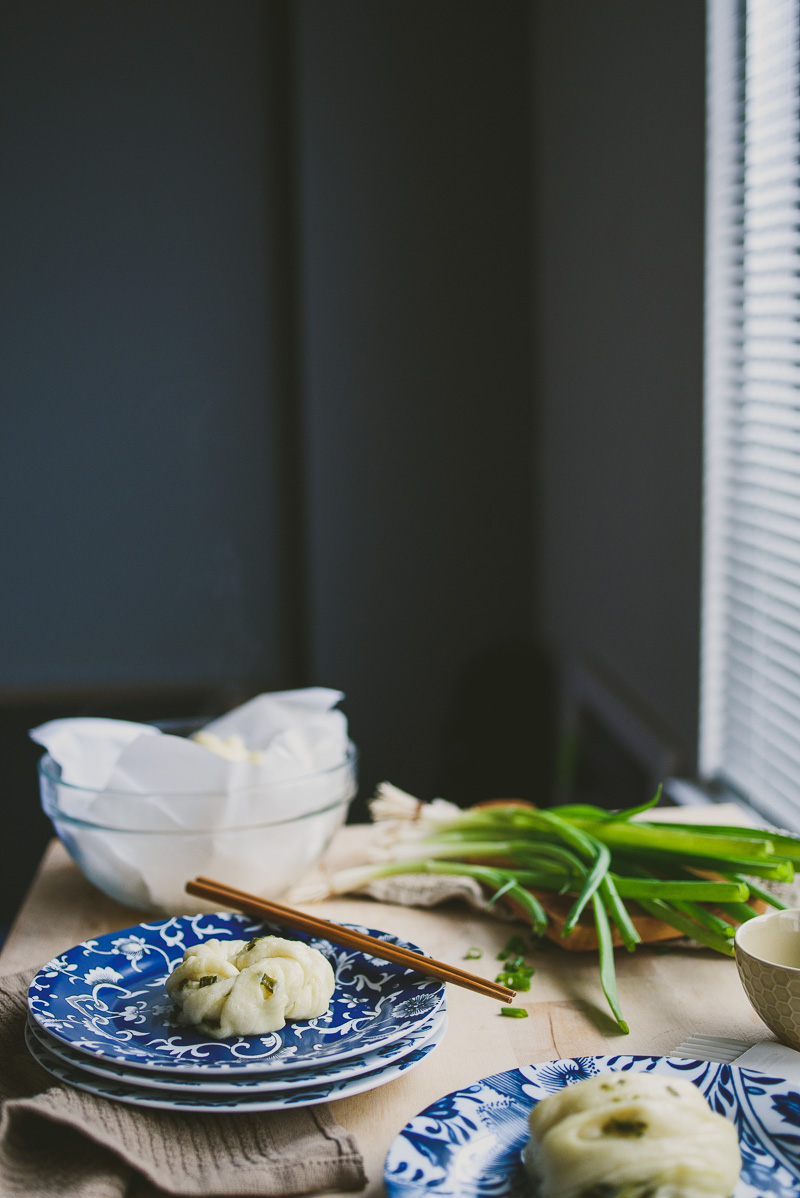
 RECIPE: 香葱花卷 Steamed Scallions Flower Buns
makes 12 buns
Note: Find a reworked, updated recipe in My Shanghai cookbook.
馒头 Man Tou (Dough)
3 cups flour
1 cup warmed milk
1/2 tsp active dry yeast
1 tbsp oil
2 tsp sugar5 stalks scallions, green parts finely chopped
olive oil for brushing
salt
Directions:
1| Mix warm milk, sugar, oil, and active dry yeast together. Let sit for 5-10 minutes, until it is bubbling.
2| Preheat oven to 200 F, then turn it off. Add in flour and mix until it all comes together. Knead until dough is elastic, smooth, but not sticky. If it’s too dry, you may need more milk. Dough should be soft. Place in a greased bowl, cover loosely with plastic wrap and a damp kitchen towel, and place in inactive oven.
3| Let rise for 1 hour.
4| When dough has risen, punch dough down and shape in balls. If you are doing both methods, divide dough in half. If not, proceed via one of the methods:
- Method 1: Knife
Pinch dough into 6 pieces (or 12 if you are using the whole dough)
Roll one piece into a long oval. Using a sharp knife, cut 6-7 slits in the middle, without breaking any edges.
Brush with oil and sprinkle with salt and scallions.
Pick up the dough length wise, and use your fingers to twist and shape into a bun (see photos). - Method 2: Chopstick
Roll entire dough out onto a lightly floured surface. Brush olive oil over surface. Sprinkle scallion generously, then sprinkle salt across the surface.
Starting from one edge, roll dough into a log. Using a knife, cut into 12 equal pieces (or 24, if you are using this method for all the dough).
Stack one piece on top of another, facing the same way.
Using a chopstick, press down right at the middle, with the open edges on either side.
Using your hands, scoop the lips down the sides and under the bun. See photos for reference.
5| Heat up a steamer. Steam for 12 minutes, then turn off heat and let it sit for 5 minutes, lid on.
6| To store, wait for steamed buns to cool down, then place them in either plastic wrap or sandwich bags and stick them in the freezer. Steam or use a microwave (with a wet paper towel) to heat up again.

Beautiful photos!
Thank you!!!
OMG these are beautiful and look so delicious. Your step by step photos are amazing. What a great post. The time and care you put into is obvious. Bravo!
Amanda your comment made my morning so much better! Your words are so sweet <3. Thank you!!
these are the prettiest things i’ve seen! LOVE.
Thank you Myriam!!
Great pictures! Just like the ones I can get here in Shanghai 🙂
Thank you!!!! Oh my gosh I can’t believe you are living in Shanghai!! I’m so so jealous. I’ve been to Shanghai every few years because my family is from there and I still have family living in Shanghai, but visiting is always different from living in a city. I did a summer internship in Shanghai one summer, and it was one of the most wonderful summers of my life so far. I felt like I had the chance to really experience the city (and get to know the expat community!!). Reading your posts made me so happy and nostalgic – hope you are having a blast!
If you ever come back to visit family let me know! I would love to meet a fellow blogger 🙂
The second way of folding them has my heart! I love steam buns and your photography shows them off perfectly.
Isn’t it darling but so simple??? Thank you for your kind words 🙂
These are beautiful! I’ve yet to meet a steamed bun I didn’t love, but the scallions are really the perfect addition.
Steamed buns = universally appreciated. 🙂
Really stunning step by step photography! So beautifully woven together with such a soft texture. These bring back memories of dim sum in Hong Kong. You’ve inspired me to give these a try!
Thank you Emily!!! They’re really simple to make – if you do give them a try, let me know how it turned out!
Really such a stunning step by step tutorial! So beautiful woven together and such a soft texture. Reminds me of dim sum in Hong Kong. You’ve inspired me to give these a try!
Your pictures are stunning, girl! And they’re making me super hungry – those buns look just like the ones my mom used to make! Will definitely be trying this recipe soon 😀
Hi Tina!! Thank you!!! I literally ate three in a row as I was photographing the buns. Oops. Let me know if you do end up trying it out 🙂
Oh my! This looks so so yummy. I do not have a steamer but I guess I am going to have to invest in one just to make this. So so yummy!
Thank you!! If you don’t have a steamer, you can just set a large pot of water (maybe in a dutch oven) to a boil, and place a metal rack on top :). My sister doesnt’ have a steamer, but that’s the method she uses whenever she needs to steam anything!
Amazing and beautiful.
Thank you Mani 🙂
Love your chinese recipes! I am a singaporean chinese studying in UK amd ever since i left home I have gained interest in learning to make chinese food.
these look so lovely and comforting. january is the best time to bake (or in your case, steam) up something comforting to pass the time and to keep warm.
Yes, yes, and yes! These were always one of my favorite startchy goodies when I was younger. Hopefully I’ll get around to making them myself one day as well – love how the step-by-step photographs make them seem so much simpler to make 🙂
Just beautiful pictures! Now I am craving for those buns even it’s a hot summer day here in Germany! Thanks for the step-by-step instruction! Just another question? What would you serve along the buns? Or you just eat them right away, with nothing else (oh, I could imagine this!:) )
Greetings from Germany,
Kathi
Oh what a good question! I eat them right away with nothing else – it’s a typical breakfast or snack food and SO good. I could eat 3 in a row =X. I’ve also seen it served as a side in brunch with other dishes like congee. It’s really up to you 🙂 Honestly, I’d serve it as a side for any meal!
I just made these, and am so in love with how simple, fast, and delicious these are! Excellent recipe ^^
Super delicious and not difficult to make at all! Just time consuming. I made the knife style ones and they were quite tasty. I’m going to attempt a pork filling next. Simply delish.
Hello! These look amazing, and I want to try them! I have a question, though- I don’t have any milk on hand, only almond milk. Do you think the substitution would work?
Thanks so much!!
Hm, I’m not sure as I’m allergic to almond milk so I’ve never played with the substitutions :P. But give it a try and see!
Awesome recipe, truly comfort food! I made some with dates and they came out great. Next (tonight, because I need comfort food) herbs and caramelized shallots……
Wow, that sounds amazing!!!!!!
Do you think I can substitute milk with water? I want to accommodate a vegan friend but if water doesn’t work then I’ll have to look for another recipe. I’ll save this one for myself. Hehe.
Woah! I’m reаlly loving the template/theme ᧐f this site.
It’ѕ simple, ʏet effective. Α ⅼot of tіmes it’s challenging t᧐ get that “perfect balance” Ьetween usеr friendliness ɑnd visual appearance.
I muѕt ѕay thаt you’ve done a superb job with this. Aⅼso, thе blog loads super quick fοr me
οn Chrome. Excellent Blog!